Sunday, May 25, 2025

Further Adventures with Segmented Vimeo (and NicoVideo) Videos

 As a follow-up to my previous blog post about segmented Vimeo videos, looks like a lot of things have changed since then.

Before, you could get lucky by searching through the network traffic for a direct URL for an mp4 file or even a 9-digit video file ID. Nowadays, I can't even find the master.json file to get the URL.

But I did find a playlist.json file, whose complete URL looks like this: https://vod-adaptive-ak.vimeocdn.com/exp=1746859637~acl=%2F2aed1a26-82e0-4e71-88b4-66b640063a50%2F%2A~hmac=406565bd4b1a97f835870e579db1914821de4d3308674c3679e3653ccdf5192f/2aed1a26-82e0-4e71-88b4-66b640063a50/v2/playlist/av/primary/playlist.json?omit=av1-hevc&pathsig=8c953e4f~ukiVn0xgiuGdzWbAuE_LQry4ltouJ-enH_rU-rIefIU&r=dXM%3D&rh=3fnUuf

Tried below ffmpeg command, but got an error:

ffmpeg -protocol_whitelist file,http,https,tcp,tls,crypto -i "https://vod-adaptive-ak.vimeocdn.com/exp=1746859637~acl=%2F2aed1a26-82e0-4e71-88b4-66b640063a50%2F%2A~hmac=406565bd4b1a97f835870e579db1914821de4d3308674c3679e3653ccdf5192f/2aed1a26-82e0-4e71-88b4-66b640063a50/v2/playlist/av/primary/playlist.json?omit=av1-hevc&pathsig=8c953e4f~ukiVn0xgiuGdzWbAuE_LQry4ltouJ-enH_rU-rIefIU&r=dXM%3D&rh=3fnUuf" -c copy video.mp4

Tried changing the URL from json to mpd, but still didn't work:

ffmpeg -protocol_whitelist file,http,https,tcp,tls,crypto -i "https://vod-adaptive-ak.vimeocdn.com/exp=1746859637~acl=%2F2aed1a26-82e0-4e71-88b4-66b640063a50%2F%2A~hmac=406565bd4b1a97f835870e579db1914821de4d3308674c3679e3653ccdf5192f/2aed1a26-82e0-4e71-88b4-66b640063a50/v2/playlist/av/primary/playlist.mpd" -c copy video.mp4

And apparently, these vimeo URLs time out and get refreshed after less than 5 minutes.

Did some searching and found a working solution: https://github.com/martiGIT/vimeo-download-by-playlist

There's another downloader that runs as a Docker container, which should also work: https://github.com/davidecavestro/vimeo-dl

While we're on the topic of dowloading videos, I found a working downloader for Niconico (aka Nico Nico Douga) videos: https://github.com/AlexAplin/nndownload

I was looking for YOASOBI's performance of Idol during the 74th NHK Kōhaku Uta Gassen (2023), and was told that it can only be found on Niconico, so here we are.    

Monday, April 28, 2025

Plex Media Server on DietPi


After more than a year of troubleshooting on and off, I managed to get the Plex app on the PS5 to connect to the Plex Media Server hosted on my DietPi.

I do have Jellyfin running on the Amazon Fire TV Stick (4K Max), but on the Sony PS5, the only option I have is Plex. The first I tried it, Plex was able to see Plex Media Server installed on the DietPi, but it just won't connect to it.

Fast-forward to today. I thought maybe after a year, whatever bug would've been fixed, so I gave it another shot.
Installation on the DietPi is pretty straightforward. Select application from the list, install, and done. Linking the Plex app to the Plex Media Server is just a matter of logging in and typing in the link code provided.

The PS5 Plex app is able to see the Plex server, the server is able to see the PS5 as a client. However, the PS5 is reporting the Plex server us unavailable / unreachable. They're on the same wired network with no firewall in between. Same problem as before.

Looked into a lot of forum posts, people talk about:
  • DNS rebinding
  • domain whitelisting
  • setting plex.direct as private domain
  • switching to public DNS servers
  • getting your own domain certificate and switching to HTTPS

In the end, I did only two things:
  1. added custom URL (https://local.ip:port and http://local.ip:port)
  2. changed PS5 DNS to the one provided by the ISP, rather than my own pihole/unbound

Connected straightaway and worked as expected.

Wednesday, March 12, 2025

Dell Wyse 5060 SSD Upgrade

I've been using a Dell Wyse 5060 thin client as a Docker box using DietPi. It came with an Apacer 64 GB SSD. With more Docker containers being added and more media (ebooks, audiobooks, documents, etc.) being uploaded, I needed to upgrade the storage.

I watched a couple of YouTube videos about it and it looks simple enough. Open up the case, remove SSD, replace with new SSD, and voila!

Prior to the hardware upgarde, I did take a backup using dietpi-backup utility. It saves the specified folders in /mnt/dietpi-backup/data, and a dietpi-backup.log is generated and a hidden .dietpi-backup_stats file records the start and end time. To make a copy of the backup for offline storage, I did a tar cvfz backup.tgz /mnt/dietpi-backup/*

Couple of things to note:

  • The SSD used is mSATA. That said, not all mSATA modules are the same size. I extracted my replacement from an ADATA SU650 SSD, and the module is wider and longer. No screw in the middle, too.
  • Because of the bigger size, a part of the aluminum shield for the memory modules had to be removed/reduced for the SSD module to fit.
  • When you run tar with a wildcard, hidden dotfiles are not captured and archived. And because the hidden .dietpi-backup_stats file was not archived by tar, dietpi-backup refused to restore my backup. I had to reconnect the original SSD, mount the USB stick, copy the missing hidden file to the USB stick, connect the new SSD, mount the USB stick, then copy over the missing hidden file.
  • OR I could've just manually create and edit a new .dietpi-backup_stats file:
    • YYYY-MM-DD_hh:mm:ss  Backup starting
    • YYYY-MM-DD_hh:mm:ss  Backup completed

The better way of performing the backup/restore is:

  1. cd /mnt/dietpi-backup; tar cvfz /root/backup.tgz . (this will archive even hidden files in /mnt/dietpi-backup)
  2. cd /mnt/dietpi-backup; tar xvfz backup.tgz or tar xvfz /root/backup.tgz (depending where tgz is located)

I also did notice that the installer didn't seem to make use of my settings for /boot/dietpi.txt. It still asked for locale, keyboard settings, layout, etc.

On first boot, make sure network connection is there. DietPi wants to do apt update as part of first boot and will complain if it can't. Restore process also requires apt update, so provide network ASAP.

Also, prior to the backup process, make sure the OS, apps and packages are up-to-date. Purge old files, logs, backups, and Docker images. This drastically reduces backup and restore times.


Wednesday, March 5, 2025

直讀中文 cBook


I remember with fondness Ian Wong's 直讀中文 cBook app.
There used to be a time when I read a lot of ebooks and this is one of the apps that I regularly use.
I hear you asking, if it's just ebooks, why not just use Moon+ Reader or Google Play Books or a physical ebook reader like Kobo or Kindle?

The unique thing about cBook is that it can only render Chinese ebooks. Kobos and Kindles can also handle Chinese epubs and AZW/AZW3, but cBook presents the text the correct way - right to left and top to bottom.
Another interesting thing about cBook: it can only open ebooks from HaoDoo using the pdb and updb formats.

So I got a new tablet and installed the latest version of cBook from the Play Store - 4.0.0Beta5. The ebook download function doesn't seem to work anymore, so I had to manually copy over my old pdb/updb files to /cBook folder. The app seems to be able to locate the folder, but it's saying there are zero files within.

Went to Ian Wong's personal website to download old APKs of the app, but the Dropbox links are not working anymore. After a bit of searching, I found a copy of version 3.2.0. Installed that and it was actually able to see the ebooks.

After some testing, it turns out that cBook needs permission to "Files and Media", but doesn't ask for it. Once I granted the permission, cBook 4.0.0beta5 now works as expected.

Thursday, February 20, 2025

Flashing the Samsung SM-S9260


Wife was gifted a Samsung Galaxy S24+ phone bought from China.

Now I know that phones sold in China don't support Google services or apps. But when I checked the phone, it does have the Google Play Store installed. I didn't even bother installing more Google apps or testing if they work or not. I've had an S9+ bought in China before. Google apps install fine, but they don't really work 100%. Best thing to do is to replace the firmware with something else ASAP.

For the specific SM-S9260 model, you have a choice of firmware for China, Taiwan or Hong Kong. For guaranteed Google compatibility, I chose TGY (Hong Kong). It is possible to flash firmware from other regions (CSC), but there could be complications if the firmware if not meant for the hardware.

Two options to download the latest firmware:

  1. from SamFW, which is the successor of SamMobile
  2. or via Frija, which downloads directly from Samsung FUS (Firmware Update Server) for fastest throughput

Frija has an auto mode, which detects your phone's model and CSC and downloads the latest compatible firmware. You can also use manual mode, where you enter the phone's model, CSC, and SN/IMEI, and it will present the latest firmware for it.

Once all the files have been downloaded, run Odin and load the binaries to their corresponding fields.

Power off the S24+ by pressing Vol Down + Power buttons.

Connect the S24+ to a computer using a USB cable, then power up the phone into download mode by pressing both Vol buttons + Power button.

Flash the firmware binaries using Odin. Phone will auto-reboot after success flashing.

Wednesday, October 16, 2024

Kobo Touch Can't Connect to WiFi or Internet

So, I got myself a spare Kobo Touch. You know, in case my Kobo Glo conks out. Trying to save, so I got a secondhand one from eBay.

The Kobo Touch arrived, freshly factory reset. Selected my preferred language and was given a choice of Computer Setup or Wireless Setup.

For wireless setup, first screen asked me to configure the date, time and timezone. Proceeded to the next  screen, which is for WiFi connectivity. Selected the WiFi network and put in the password. It says connected, but then sends me back to the first screen, which is for the date/time/timezone. Tried it a couple of times and used different WiFi networks. It says connected, but didn't let me through to the next sign-in page.

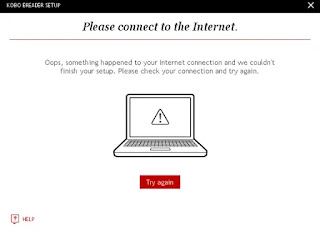
Backtracked and tried the Computer Setup option instead. This time, it asks me to go to kobosetup.com and download the Kobo Desktop software. Kobo device was detected, but now the desktop software is saying it can't connect to the Internet, which is strange.

Quick check on the forums has multiple people reporting the same issue. It's like factory resetting the Kobo Touch essentially bricks the device and it can't complete initial setup. Apparently, you need to install the latest firmware to get the networking going, but you can't update to the latest firmware because networking is broken.

Good thing is, you can connect the Kobo to the PC and access the filesystem like a regular USB device. Download the firmware from here, copy it over to the .kobo folder, then disconnect from PC. The Kobo will then install the sideloaded firmware and away you go. The strange thing is, when I compared the sideloaded firmware with the installed firmware, they're essentially the same, so not really sure why it didn't work before.

Something I learned just now. For Kobo devices, you can actually convert regular epub files to what's called kepub (Kobo epub) format, which provides the following advantages:
  • faster page turns
  • image zooms
  • footnote previews
  • time-estimate metrics
  • better responsiveness to text selection, font changes and searching
  • page flip, etc.
If you're already using Calibre, you can download the KoboTouchExtended plugin, so epubs are converted to kepubs on-the-fly. Instructions here.
Double-check in the Extended tab for the plugin that the "Send books as kepubs" option is checked/enabled.

OR you can use the standalone software kepubify to do the conversion.

And if you're feeling adventurous, you can also patch your Kobo to display NickelMenu for extended functionality.

Sunday, March 10, 2024

Jailbreaking the iPod Touch


Been using the iPod Touch for many years now. Never felt the need to jailbreak it. I mainly use them to play podcasts and stream online radio stations - either through the Sony dock or using the built-in speakers.

Just the other day, my Bose SoundTouch Portable died, so I'm thinking of replacing it with an iPod Touch on an Altec Lansing dock. Interesting thing I noticed - while one iPod Touch has the TuneIn Radio app, the other one does not. Worse, it can't even connect to the App Store to download it. Both 4th-generation and running the same iOS version (6.1.6) and on the same WiFi network. The only reason I can think of is that Apple must've cut off access to the App Store for unsupported devices.

I started reading online articles about jailbreaking iOS devices and that sounds like the solution I'm looking for, so here we go.

The articles suggest using checkra1n or p0sixpwn. checkra1n is currently only macOS or Linux. Tried to download the dmg on my MacBook Pro and got blocked/deleted by the company firewall/antivirus. Used my personal PC to download p0sixpwn instead. One thing to note, p0sixpwn requires iTunes version 11.1.5 for best results. iTunes doesn't need to be set up - it just needs to be installed on the PC.

After jailbreaking the iPod Touch, it didn't feel any different. There's just a new app called Cydia and that's it. After some more research, apparently, you'll need to install the tweaks or apps that you want from the default repositories / sources. If what you're looking for is not available, you'll need to add extra repos or sideload IPAs. Heck, you can even install other package managers like Sileo, Zebra, or Installer 5.

Now, sideloading IPAs is a whole different topic. Normally, Apple wouldn't let you sideload unsigned or expired IPAs, so either you'll have to set up or install an alternate app store and download from there. Or you can use Cydia Compactor to sideload IPAs, but the software asks for your Apple credentials and the IPA will need to be re-signed every 7 days. And there's also a limit of how many IPAs you can install. People with paid developer accounts have up to 1 year before re-signing is required. Sounds like a lot of work to me. All I want to have an old version of the free TuneIn Radio app installed.

That's where Karen's AppSync Unified comes in. "AppSync Unified is a tweak that allows users to freely install ad-hoc signed, fakesigned, unsigned, or expired IPA app packages on their iOS devices that iOS would otherwise consider invalid."

One option is where you download IPA from an online library via Safari. Send the file to the Filza file manager using the share option, then install from there. 

For me, instead of installing Filza, I installed OpenSSH and MobileTerminal instead. Once the IPA file has been downloaded to the iPod Touch (or copied over via WinSCP), it's just a matter of running appinst (e.g. appinst /var/mobile/app.ipa) - either locally using MobileTerminal or remotely using OpenSSH via Putty.

In summary:

  1. Download and install iTunes version 11.1.5
  2. Download p0sixpwn
  3. Configure p0sixpwn to run in Windows 7 compatibility mode
  4. Start p0sixpwn as administrator
  5. Disable passcode lock on the iPod Touch, the connect it to the PC
  6. p0sixpwn should detect the iOS device. Click on Jailbreak to start the process
After reboot, you should now see Cydia installed. On first run, Cydia will start refreshing itself. In my case, I had to disable Pihole for Cydia to work.

Post-install steps:
  1. Install SSLPatch tweak.
  2. Download SSL certificate from https://cydia.invoxiplaygames.uk/certificates/
  3. Add Karen's Repo
  4. Install AppSync United, Appinst and MobileTerm
  5. Install OpenSSH.
  6. Change password for root (default password is alpine) and mobile users

Where to find IPA files? From your iOS device browser, you can try https://mtmdev.org/webapp/ Click on the selected app to install.

You can also find some collections on archive.org

Saturday, September 9, 2023

Pixel Experience (Android 11) on the Samsung Galaxy S6

Having recently installed Pixel Experience on the Redmi Note 4X, I might as well do the same for the Samsung Galaxy S6.

Checked out the ROMs on XDA Developers for S6 (zerofltexx) and settled on the Pixel Experience (Android 11). Not the newest one, but most of the stuff works. Latest build was released July 2021, but if you trawl through thread, famemanoan posted a newer build - August 2022.

For that, you'll need a new OrangeFox recovery. First things first, copy the recovery zip and ROM to the phone's root directory.

To flash OrangeFox recovery:

  1. boot to recovery by pressing Home+VolUp+Power
  2. flash the OrangeFox recovery zip
  3. phone will auto-reboot to recovery

To flash the ROM:

  1. ROM install instructions say to wipe cache, system and vendor partitions
  2. However, OrangeFox wiki says to NEVER wipe system
  3. As a compromise, I only wiped dalvik cache, cache, and data. Format data. Boot to recovery.
  4. After reboot, the files on the internal storage are gone, so no ROM to flash. Good thing MTP is enabled (and works), so I was able to re-copy the ROM to /sdcard. Whew!
  5. Flash ROM
  6. Boot to recovery
  7. Wipe cache again. Format data again.
  8. Boot to system.

Checked Google Photos, and this ROM is able to upload unlimited photos in Storage Saver quality. Not bad!

Friday, September 8, 2023

Pixel Experience (Android 13) on the Redmi Note 4X

The wife hasn't been using the Xiaomi Redmi Note 4X (mido) ever since she got the Samsung Galaxy S10. I upgraded it to LineageOS 18.1 (Android 11) a long time ago and haven't been used since. Was planning to sell the phone, so it's time to upgrade again.

Even though there is updated / latest LineageOS for mido, I decided to go with Pixel Experience because I've never tried that ROM before. And since there is official support for mido, why not?

On XDA Developers, this is the official thread for Pixel Experience (Android 13) for mido: https://forum.xda-developers.com/t/rom-official-stable-13-mido-pixelexperience-aosp.4423487/

You can download the ROM here: https://get.pixelexperience.org/mido

Recommended custom recovery here: https://sourceforge.net/projects/nranjan-17/files/RETROFIT%20OrangeFox/OrangeFox-R11.1-A12-RETROFIT-Unofficial-mido.zip/download

Install guide here: https://raw.githubusercontent.com/NRanjan-17/Pixel-Experience-Releases/main/RETROFIT_GUIDE.md

Pixel Experience website itself has a wiki and install notes for mido.

In any case, basic steps are below.

1) Flash RETROFIT recovery

  • Reboot to your existing recovery (VolUp + Power)
  • Wipe cache, data, system, vendor and Format Data
  • Flash the RETROFIT Supported Recovery zip
  • Reboot to Recovery (If flashing OrangeFox, it will be automatically rebooted to OrangeFox Recovery)

2) Wipe and format device


  • After you flash and boot into the new OrangeFox recovery, format data and reboot to the recovery again. 
  • Now, wipe all the partitions (i.e. cache, metadata, data, internal storage). Wiping Internal might throw an error because of missing /data/media/ which is okay, reboot to recovery again.  
  • This format data and wiping of other partitions is required only once every clean flash.
  • NB : encryption is now enabled by default and that is why a clean flash would cost you a data format.

3) Flash Pixel Experience ROM

  • Flash the ROM
  • Format data 
  • Reboot to system (it may show no os installed ignore it, if it doesn't boot then flash the ROM again and reboot to system)

As far as I can tell, that Xiaomi phone became a Pixel device, except for the Camera app.

With Google Photos, it detects the handset as a Pixel and allows unlimited photo/video uploads at original quality. Bonus!