Saturday, December 30, 2017

Speeding Up an Old iPad

Was gifted a pre-loved iPad 2 (64GB, WiFi, Model A1395) in time for my kid's new school year, which requires a BYOD (bring your own device). As expected, the tablet of choice by the school is an Apple iPad. Good thing they didn't specify a particular model.

The iPad 2, with its 132 ppi resolution and 1 GHz dual-core A5 processor, is starting to show its age, but still runs fine, though a bit sluggish. Most of the "suggested" apps downloaded and installed just fine on IOS 9.3.5. A few required IOS10 or IOS11, and simply won't install. Apple's iWork productivity suite (Pages, Numbers, and Keynote) and GarageBand reported incompatibility with the iPad.

As a workaround, go to the App Store app, and tap on Purchased. Select "Not on this iPad". Select again the apps that wouldn't install. If there is an older version that is compatible with the current firmware/hardware, you will be given the option to download that instead. Managed to get the iWork apps installed this way.

Next step is to speed up the old clunker. Most obvious choice is to disable the features that you don't really need:
  • Spotlight indexing
  • App Store auto-update
  • background app refresh
  • notifications
  • multi-finger gestures
  • keyboard auto-correct, auto-capitalizaiton, check spelling
  • location services
  • perspective zoom on the home and lockscreen wallpapers
  • transparency
You can also enable reduce motion, deleted rarely-used apps to recover diskspace, upgrade to the latest IOS, and restart the iPad once in a while.

Rotating Vertical Videos

Everyone on the Internet is saying never to take videos in portrait mode (vertically). However, there are some scenarios that call for vertical videos, much like pictures that look better in portrait mode.

Thing is, once downloaded from my DSLR, those vertical videos show up as horizontal videos on my PC, with the subject lying down. Usually, I just use Freemake Video Converter to rotate them into portrait mode again. However, there are some videos that Freemake is not able to handle, for whatever reason. The MOV file loads fine, but when I click the "Edit/Play" button, the program (version 4.1.10) just quits/exits with no warning. Thanks to Google, I found a way to do the same thing using VLC.

So this is how to rotate your portrait-mode videos:

  1. Run VLC.
  2. Under Tools, selects Effects and Filters (Ctrl+E).
  3. Click on Video Effects tab, then click on Geometry sub-tab.
  4. Enable Transform, and select "Rotate by 90 degrees" from the drop-down list, and click Close. There is another option to Rotate, but this is more if you want to rotate using a specific angle, instead of the preset ones.
  5. Go back to Tools --> Preferences. Under Show settings, select All.
  6. From the left pane, select Stream output, then Sout stream, then Transcode.
  7. Under Video filter, enable Video transformation filter. Click Save.

You can test that the whole process works by playing your vertical video. It should now play right side up.

And this is how to convert the video permanently:

  1. Under Media, select Convert/Save (Ctrl+R).
  2. Add the video file you want to rotate.
  3. Click on the drop-down arrow beside the Convert/Save button and select Convert (Alt+C).
  4. Specify a destination file for the converted output.
  5. Default profile is MP4 container using H.264 video and MP3 audio. Click on the Tools icon on the right to edit the settings.
  6. Click on the Audio codec tab. Select MP3 as codec and sample rate of 48000. This is so because my original video uses PCM and 48000 sample rate, which I'd like to keep.

So far, this gives me the best results. I tried the "Keep original video track" option to preserve video quality, but in this case, the video was not rotated.


Wednesday, December 27, 2017

Grand Pacific Drive Day Out

Planned the day's itinerary using Google search. As simple as typing in "Sydney Wollongong itinerary". Next step is to put in the multiple stops in Google Maps as one trip.

First stop is the Sri Venkateswara Temple in Helensburg, around an hour's drive away. Been to this Hindu temple before, but never went in. Nothing much to it, all you need to do is to take off your footwear. High ceilings, open spaces, mats on the floor for devotees to sit on, hundred of deities all round the temple. Behind the temple is a hall for functions, and a canteen serving food for eat-in or takeaway.

Next stop is the Bald Hill Lookout. Don't make the mistake of putting in Stanwell Tops Lookout in Google Maps. It'll take you to a totally different spot. Bald Hill Lookout is where you get 180-degree panoramic view of the Illawara escarpment, the Sea Cliff Bridge and the Tasman Sea. It's also quite popular with hang gliders. The Sydney Hang Gliding Centre is just nearby. There's also a monument to Lawrence Hargrave, an Australian pioneer of flight.

Driving down Lawrence Hargrave Drive, it eventually becomes the 665-meter long Sea Cliff Bridge. Thought of taking a short bridgewalk, but all available parking spaces along the bridge are taken.
Took a right at Cliffton School Parade after the bridge and stopped at Rube Hargrave Park. There's a nice playground for the kids and a public toilet. Parking is limited, but doesn't matter as the tourists simply parked along both sides of the street. A group of Chinese tourists even took the last remaining disabled parking. None of them looked disabled to me. Across the highway is the Moronga Park. Took a short stroll on the bridge and went back, as it started to get hot.

Next stop is Austinmer Beach, about 10 minutes' drive away. There's a carpark between the beach and the drive, but it's usually full. Street parking is not much better. Lunch is basically burger, fish and chips and chicken nuggets and chips from Shells Diner. Then, it's off to the rock pools to get our feet wet. There are toilets and showers and change rooms nearby.

Original plan was to go to the Wollongong Lighthouse, then Nan Tien Temple. However, as time is running short, we decided to head straight for Kiama instead. That's another hour of driving. Got to see the blowhole in action and the lighthouse. Farmer's market is on from 3pm till 6pm, but there's absolutely no parking spot to be found nearby. Time to head home.

Monday, December 18, 2017

Mr. Robot Fight Club

So I heard some good things about Mr. Robot. Being a computer nerd, I decided to watch the series.

It starts off interesting enough. Interesting plot, quirky characters, believable hacking scenarios. Geeky cyber-security engineer saves his company's biggest client from a malicious cyber attack, and becomes entangled with a hacker group called fsociety, who wants to bring down E Corp, the world's largest conglomerate.

Thing is, the more episodes I watched, the most I felt I've seen this before.

  • Long, gloomy shots with an olive-green tint? Check.
  • The loner main character, who has bouts of depression and paranoia? Check.
  • An underground group who wants to destoy consumer debt records, so everyone gets a clean slate? Check.
  • An alter ego who occassionaly takes over and runs the show without the person's awareness?? Tyler Durden, is that you? No, it's Mr. Robot!

Needless to say, I stopped watching Mr. Robot after season one.

Friday, November 24, 2017

iA Writer - Denote Alternative

Just noticed that my Denote notes on the smartphone are not being synced back to Dropbox. I did change my Dropbox password recently, so I thought that must've been the problem.

On Denote, I don't see any option to change/update the Dropbox password, so I assume it's probably done during initial setup after installation.

I promptly uninstalled and re-installed Denote. No prompt to sync with Dropbox. While most newer apps would have a three-dot settings/overflow icon on the action bar, none can be found anywhere in the UI. Given that Denote was last updated October 2013, I'm not surprised.

Some tablets and mobiles have a bottom navigation bar, which may be used to call up the settings menu, but my Samsung Galaxy S7 does not display this. After some research, the workaround is to enable Assistant menu under Accessibility --> Dexterity and interaction. A floating icon shows up where you can call up the settings menu. From this point on, I was able to get Denote to start talking to Dropbox. However, my notes are still not showing up.

Turns out Dropbox dropped support for its v1 API on Sept 2017 in favour of v2. 2Storks, the developer of Denote, didn't update the app to make use of v2, hence sync functionality is broken. I was thinking of switching to Textfile, but turns out that that one was also not updated.

All I want is a text editor that syncs (two-way) with Dropbox. After evaluating a few apps, it came down to Monospace and iA Writer.

Despite what Monospace says, I can't find the option to sync with Dropbox. Syncing with Google Drive is a pro/paid feature. That said, I quite like the hashtag feature for file organization.

From my limited time with iA Writer, it seems to fit the bill. Syncs properly with Dropbox. Even supports Markdown. Swipe left and right to change views.

Tuesday, October 17, 2017

Check Running Process

What we'd like to do here is to check for the presence of a running process. If present, do x (echo Running). If not, do y (restart said process).

First step is typically done by running ps and doing a grep on the output for the process name (ps -ef|grep process). This merely checks for presence and not the state of the process. In the case of no match, grep will still match the original grep command, thus reporting a hit. To get around this, do an inverse-match for grep (ps -ef|grep -v grep|grep process). Another option is to use pgrep.

So you'd have something like this:
#!/bin/sh

if ps ax | grep -v grep | grep process > /dev/null
then
    echo "Running"
else
    echo "Not running. Starting."
    /opt/process/bin/process restart
fi

If you plan to run the script as a cron job, best to silence all output (/opt/process/bin/process restart &> /dev/null).
Or better yet, run the check commands as the cron job itself (every 15 minutes):
*/15 * * * * pgrep process > /dev/null || /opt/process/bin/process restart &> /dev/null

Cron, Cron Jobs, and Crontab

Cron in a Linux/Unix utility/daemon that runs tasks (cron jobs) in the background at regular intervals.
A crontab (cron table) is basically a file that contains the schedule of cron jobs to be run at specific times.

  • crontab -l to list the crontab entries
  • crontab -e to edit the crontab file
  • crontab -r to remove your crontab file

Cron entries use the following syntax:
*     *     *   *    *        command to be executed
-     -     -   -    -
|     |     |   |    |
|     |     |   |    +----- day of week (0 - 6, where Sunday=0)
|     |     |   +------- month (1 - 12)
|     |     +--------- day of month (1 - 31)
|     +----------- hour (0 - 23)
+------------- min (0 - 59)

Entry: Minute when the process will be started [0-60]
Entry: Hour when the process will be started [0-23]
Entry: Day of the month when the process will be started [1-28/29/30/31]
Entry: Month of the year when the process will be started [1-12]
Entry: Weekday when the process will be started [0-6] [0 is Sunday]

* in the minute field means command will be executed every minute.
*/10 means command will be executed every minute. This repeat pattern is not supported by all OS, so better to just use 0,10,20,30,40,50.
You can also use "-" to represent a range of values. For example, 0 1-2 * * * means command will be run at 1am and 2am only.
For readability, you can also use sun, mon, tue, wed, thu, fri, or sat for day of the week. 7 is also acceptable for Sunday.

After editing the crontab, remember to run "service crond reload" to take the new jobs into effect.

Not sure about your crontab syntax? Try crontab.guru.

Friday, October 13, 2017

STDIN, STDOUT, and STDERR

Have started scripting again, and have forgotten all about stdin, stdout, and stderr - and the various syntaxes. Time for a refresher.

Ok, so if I was to do an ELI5:
Every process is initialized with three open file-descriptors: stdin (standard input), stdout (standard output), and stderr (standard error).

  • stdin (file handle 0) is where the process gets input from you (usually from the keyboard or from pipes)
  • stdout (file handle 1) is where process output is displayed (usually sent to the console or a file or a pipe)
  • stderr (file handle 2) is basically stdout for errors (usually to stdout unless redirected elsewhere)

Let's take this for example:
myscript <infile 2>errfile

  • A process is created for myscript.
  • infile is opened as standard input for myscript (file handle 0)
  • errfile is opened as standard error (file handle 2)
  • myscript output is sent to /dev/tty by default (file handle 1)

Separating stderr from stdout is a great idea when you know command execution will result in errors, and you don't want them cluttering up valid entries in your stdout. Great example is when you're grepping for something. Most of the time, you get one or two hits, yet stdout is filled with "Permission denied" entries for protected directories. What to do?

grep needle /home/haystack/* > results.txt
Valid results redirected to results.txt; bad results displayed on the console.

grep needle /home/haystack/* 2> errors.log
This time, stderr (2) is redirected to errors.log, while valid results are displayed on the console.

grep needle /home/haystack/* &> output.txt
With this, everything (stdout and stderr) is redirected to output.txt, with nothing sent to tty.

If you want all results displayed on screen and saved on file, pipe them to tee:
grep needle /home/haystack/* |& tee output.txt

If your version of bash is giving you a syntax error, try this less elegant version:
grep needle /home/haystack/* 2>&1 | tee output.txt
This basically redirects stderr (2) to stdout (1).
1>&2 redirects stdout (1) to stderr (2).

What if you simply do:
grep needle /home/haystack/*  | tee results.txt
You get stdout on the screen and in the file, but the console will also display stderr.

Note that the above examples will overwrite if the file exists. Use >> and tee -a to append.

Wednesday, October 4, 2017

Xiaomi Xiaofang 1080P Wireless IP Camera Review

Found some time to finally sit down and write a review of the Xiaomi Xiaofang WiFi IP camera. The camera itself is a glossy white 50mm plastic cube - lens assembly in front, speaker, status LED and USB ports (full-size and micro-USB) at the back, and microSD slot, air vent and reset button at the bottom. The articulated arm and swivel base adds another 6mm to the height. Weight is 100g.

For the price, I'm very impressed with what it supposedly can do.

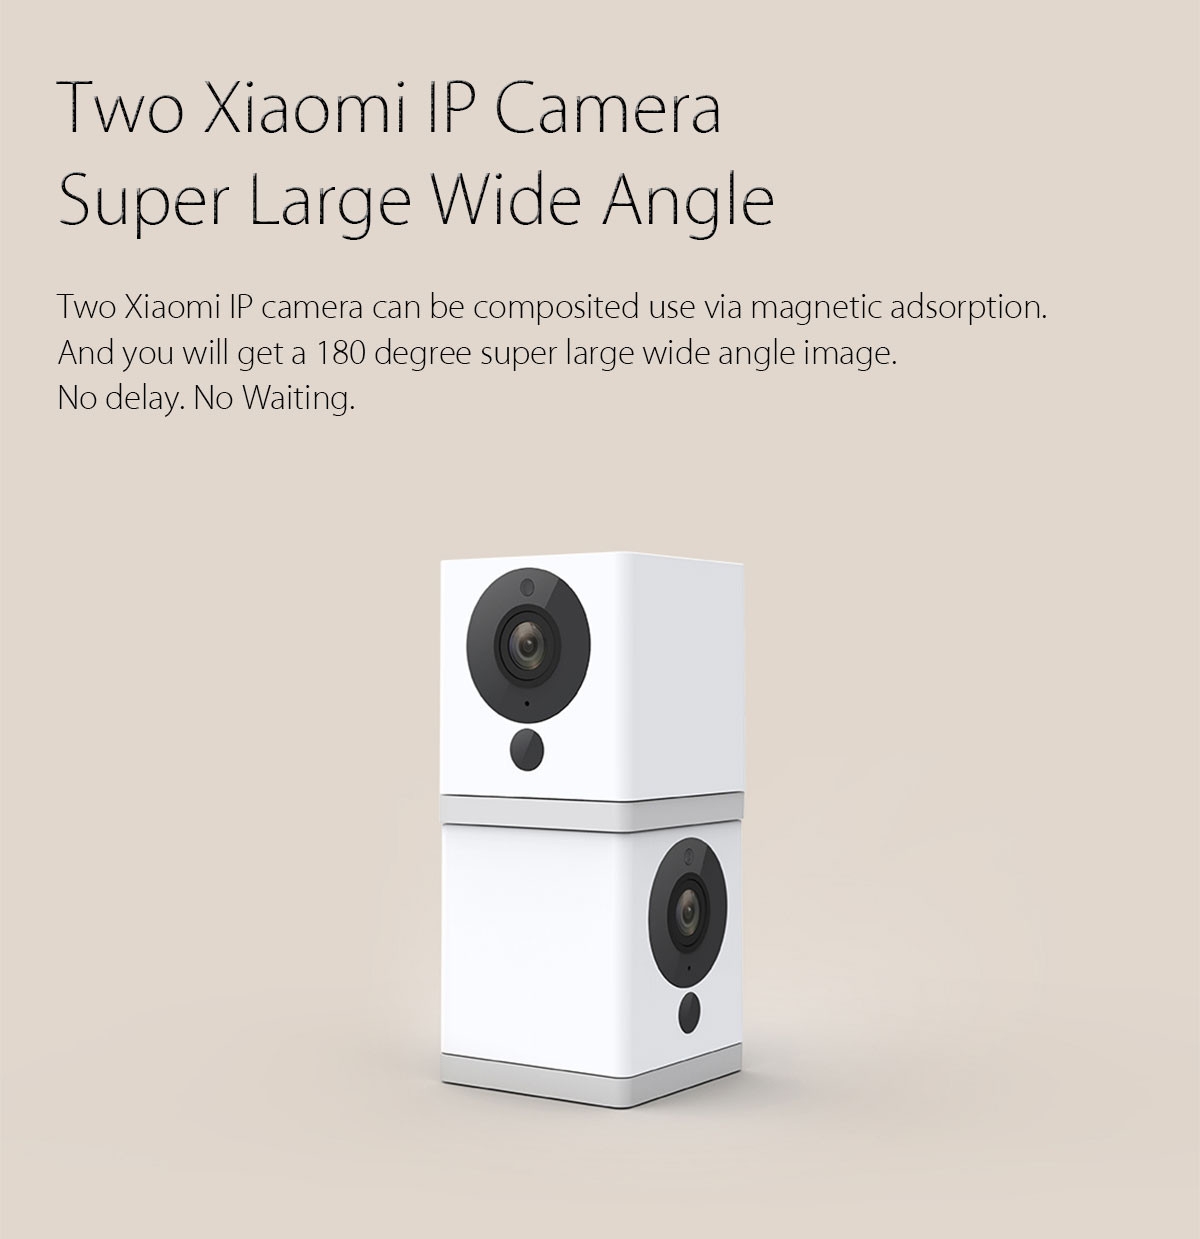
  • 1080P (1920x1080) full HD resolution video feed via the f2.0 aperture 110-degree lens. If you position two Xiaofangs together, the app supposedly creates a 220-degree panorama.
  • The lens assembly also has an IR-cut double filter with 2 infrared LEDs, which provides night vision up to 9 meters. (You can hear a click when the filter cuts in.)
  • The Mi Home app for the Xiaofang has a Speak button, which enables the intercom functionality.
  • The camera also come with smoke and CO alarm monitor function. Basically, it uses sound recognition to detect that the smoke or CO alarm has triggered, and then sends you a notification.
  • The camera can be configured to record video constantly onto the microSD card (64GB max) or only when motion is detected. Taking of timelapse photos also supported. The videos are also synced to Xiaomi's cloud storage (free!), so you can access/view them remotely.
  • While watching the realtime video feed, you can take stills or record video.
  • Network connection is via WiFi (2.4GHz 802.11 b/g/n). Remote access via WiFi or cellular network.
  • The camera requires 5VDC 1A and is powered via the microSD port. Given that USB ports are almost everywhere (heck, you can even use powerbanks), that opens up options where the Xiaofang can be installed. Add that magnetic base into the mix, the options are limitless!

Initial setup is a bit tricky though, if you don't understand Chinese/Mandarin.
  1. First off, download the Mi Home app from the Google Playstore. The retail box comes with a QR code, which should give you the link, or just do a search from within the Playstore.
  2. Set your location/locale to Mainland China, or the camera will not work. Apparently, it's not supposed to be used outside of China.
  3. Log in to your Xiaomi account, or create one if you don't have one yet.
  4. Click on the "+" icon to Add Device. Select the Xiaomi Xiaofang from the list. Note that you might see two entries. Choose the one with the shorter title, as the other one is for WiFi Direct mode.
  5. Apply power to the camera.
  6. Long press the setup button at the bottom, until you hear a voice prompt, which says/means "Waiting for connection".
  7. At this point, enter the credentials for the WiFi network that the camera is supposed to connect to using the Mi Home app.
  8. Point the camera to the Mi Home, which should now be showing a QR code. Another voice prompt will indicate successful connection.

Note that the camera's default setting is to auto-record. Might want to turn that off.

Been playing with the camera for a couple of days now, and so far so good. Most of the features work as advertised - speak, audio, full screen, look back, timelapse, night vision, and dormancy. There are a few times when I cannot connect to the device, but it's easily fixed with a power reset. Not so convenient when you're in a remote location.

Motion detection is a bit sensitive. The clouds would pass by, changing the sunlight patterns on the blinds, and that's enough to trigger motion detection. Downloading videos also take a while, probably because they're coming from some server in China. Motion-detect videos seems to be limited to 16 seconds.

The camera comes with firmware version 3.0.3.56. The app has been nagging me to upgrade to 3.2.0.30, which I'm holding off, as there are reports that after upgrade:

  • IR LEDs do not turn off even during daytime
  • Camera not working when used outside China (geoblocked?)
  • microSD card not detected

There is an option to lock down access the camera with a PIN password or fingerprint, but not sure how secure that really is. *cough* backdoor *cough*

For those who don't want the video feeds going to China, there is an option to apply some hacks via the microSD card to disable cloud service and stream via RTPS. That said, some of the functionalities become broken. Installation instructions here.

All in all, a neat little WiFi security camera.