Got an alarm about this server having high CPU usage. From experience, I know it's usually due to memory exhaustion.
How to check memory usage in Linux?
[root@server ~]# free
total used free shared buff/cache available
Mem: 2097152 482772 1614380 0 0 1614380
Swap: 2097152 0 2097152
[root@server ~]# free -m
total used free shared buff/cache available
Mem: 2048 471 1576 0 0 1576
Swap: 2048 0 2048
Can also read /proc/meminfo file.
[root@server ~]# cat /proc/meminfo
MemTotal: 2097152 kB
MemFree: 1601748 kB
MemShared: 0 kB
Buffers: 0 kB
Cached: 0 kB
SwapCached: 0 kB
Active: 0 kB
Inactive: 0 kB
HighTotal: 0 kB
HighFree: 0 kB
LowTotal: 2097152 kB
LowFree: 1601748 kB
SwapTotal: 2097152 kB
SwapFree: 2097152 kB
You can use top command to get BOTH memory and CPU usage.
If have a newer Linux distribution, you can also use htop, which organizes the information better.
With top, the processes are sorted according to decreasing CPU usage. If you happen to be running Java apps, expect extra long paths and command lines that are truncated. To see the complete command, use the -vv switch (very verbose) to wrap around the output.
To view the processes organized in a tree diagram, which shows the relationships among the processes, use the pstree command.
Output showing garbled or strange characters? That's probably because the system is using the default UTF-8 language/character encoding. If you're too lazy to change the encoding, just use the -A (ASCII) switch.
Monday, June 4, 2018


Tuesday, May 29, 2018
Recipe 2018.05.29 - Sliced Chorizo and Diced Potato

Two sticks of chorizo - sliced. Two potatoes - skinned, diced, salted.
Fry the chorizo slices using a little bit of olive oil (or duck fat, if you have). Once a bit charred on both sides, remove from the pan.
Add more oil to the pan. Bring to high heat. Fry the diced potato until brown and crunchy on all sides. Add in the chorizo slices, then serve.
Friday, May 25, 2018
Recipe 2018.05.25 - Crispy Skin Duck Breast
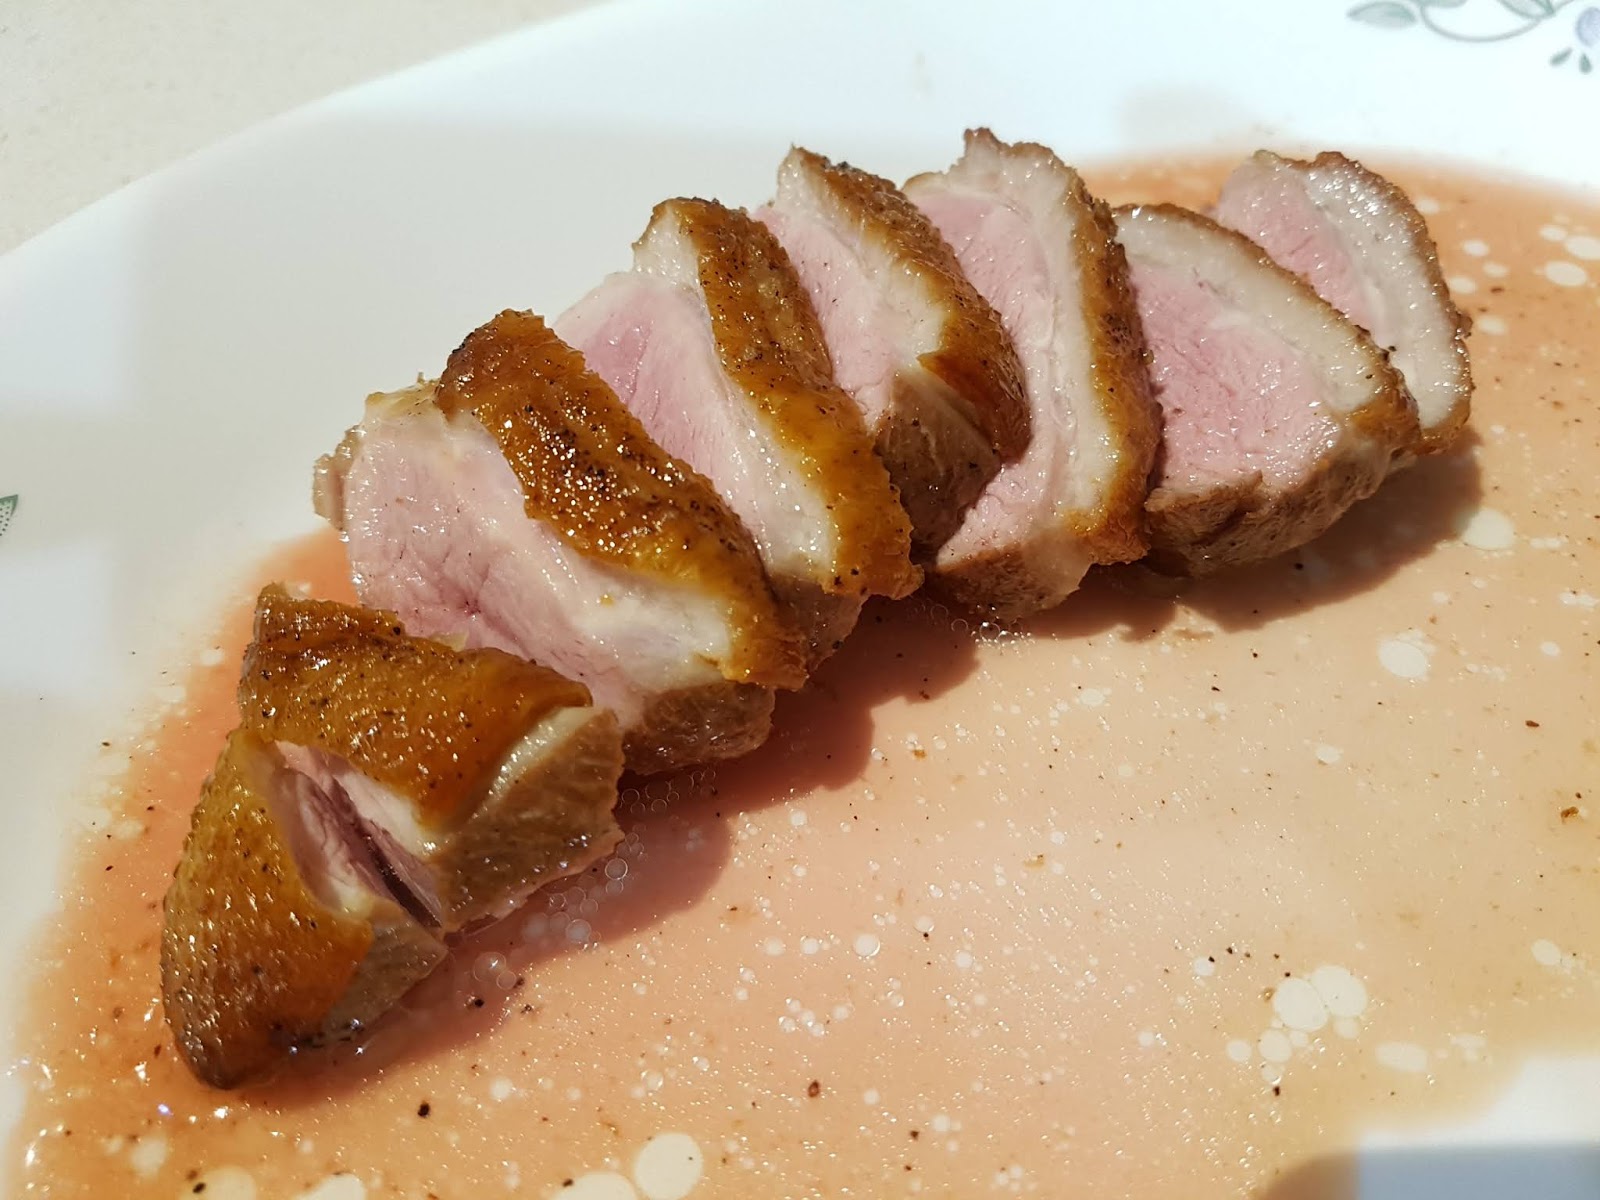
Make sure the duck breast is at room temperature. For best results, score the skin of the duck breast in a crosshatch pattern, then apply salt and pepper all around. If you're lazy like me, you can forego the scoring, but it'll take longer to render the fat. Be careful not to score all the way down to the meat. The salt is to draw out the moisture, so the skin ends up crispy. Pat the skin down with a paper tower to make sure it's really dry.
Lay down the duck breast skin-side down on a non-stick pan at room temperature. If the pan's been preheated, then the skin will seal, locking in the fat, which is not what we want. Gradually turn up the heat, so the fat renders. Once the skin is crisply, turn over the breast. Turn up the heat to seal the duck breast.
Remove the pan from the stove and into a preheated oven (200°C), again skin side down for about 6 - 8 minutes.
Once done, rest for 5 minutes - skin side up this time. Cut into slices and serve.
Tuesday, May 8, 2018
Rasterizer vs. Rasterbator

In the case of Rasterizer and Rasterbator, these software take in an image file as input and blows up the image into a giant poster (in PDF) full of dots of varying sizes to simulate the original image. It's actually half-toning, but let's not get pedantic here.
The Rasterizer (currently v0.7) is a Java program that you download and run from you Mac or PC. You can run it via the CLI or a GUI front-end. With the Rasterbator (v1.21), you can do the rasterisation online by uploading your image or providing a URL, or you download an offline, standalone software.
Both software can do the job, but I prefer Rasterbator as you get a preview before you commit to the final PDF. The online version even overlaps a human figure, so you can estimate how big the final wall art will be.
Wednesday, May 2, 2018
XMPP Secure Messaging
Started looking for a messaging solution to communicate with my kid when he's away from home. Why not get him a phone with a SIM, you say? Well, he's not away that often, and I don't want to pay for an ongoing phone service that I'm not using. That removes WhatsApp, Viber, WeChat, Duo, Allo, etc. as an option as they require a verified mobile number in order to work. There are other options like Facebook Messenger and Google Hangouts, but that requires a user account, which I don't think a kid under 10 can legally sign up for.
Next best option? IM via XMPP. Signing up for an XMPP account is free and easy. All you need is a username and password. No other verification needed. For XMPP client, I'm using Conversations for Android. First, I tried ulloo.net. For some reason, OMEMO encryption didn't work. Tried xmpp.jp - same thing. At least xmpp.jp supports presence. Then I tried, chatme.im. This time, encryption (and presence) works fine. Note that chatme.im's website is in Italian, and I can't find any English option. (Google Translate is your friend.) If all you want is to register for an account, go here.
The great thing with Conversations is that it just works - no messy configuration needed. Just enter the username and password that you used when you signed up with your XMPP provider, and off you go.
Next best option? IM via XMPP. Signing up for an XMPP account is free and easy. All you need is a username and password. No other verification needed. For XMPP client, I'm using Conversations for Android. First, I tried ulloo.net. For some reason, OMEMO encryption didn't work. Tried xmpp.jp - same thing. At least xmpp.jp supports presence. Then I tried, chatme.im. This time, encryption (and presence) works fine. Note that chatme.im's website is in Italian, and I can't find any English option. (Google Translate is your friend.) If all you want is to register for an account, go here.
The great thing with Conversations is that it just works - no messy configuration needed. Just enter the username and password that you used when you signed up with your XMPP provider, and off you go.
Tuesday, May 1, 2018
Capturing L2TP Sessions
Lately, we're been seeing more and more instances of create session timeouts with the cause code 100 - "remote peer not responding".
With constant tunnel failure, it's likely to be due to unreliable transport. Either lost packets or the LAC/LNS getting the sequence numbers wrong, requiring a tunnel re-establishment. Best way to check is to get a trace and verify that the correct Nr/Ns sequence numbers are being used.
When capturing packets from an L2TP interface, you're getting both control messages and payload packets (both port 1701). Bulk of the traffic would be the latter, which does not really help with troubleshooting. To capture only the control messages, use this filter:
udp[8]>>7=1, where highest bit in the first byte of the UDP payload is the control flag
Obviously, if talking to multiple LNS, use the appropriate host IP as extra qualifier.
Good if your requests come in one at a time, and answered in sequence, like so:

More often than not, they come in bursts, and the LNS responds to some but not all. And some responses are delayed, which makes session tracking a challenge.
Best way to handle this is to look at the Assigned Session ID and Session ID in ICRQ, ICRP, and ICCN messages.
With constant tunnel failure, it's likely to be due to unreliable transport. Either lost packets or the LAC/LNS getting the sequence numbers wrong, requiring a tunnel re-establishment. Best way to check is to get a trace and verify that the correct Nr/Ns sequence numbers are being used.
When capturing packets from an L2TP interface, you're getting both control messages and payload packets (both port 1701). Bulk of the traffic would be the latter, which does not really help with troubleshooting. To capture only the control messages, use this filter:
udp[8]>>7=1, where highest bit in the first byte of the UDP payload is the control flag
Obviously, if talking to multiple LNS, use the appropriate host IP as extra qualifier.
Good if your requests come in one at a time, and answered in sequence, like so:

More often than not, they come in bursts, and the LNS responds to some but not all. And some responses are delayed, which makes session tracking a challenge.
Best way to handle this is to look at the Assigned Session ID and Session ID in ICRQ, ICRP, and ICCN messages.
- ICRQ will have Session ID = 0 and an Assigned Session ID chosen by the LAC.
- When the LNS responds with an ICRP, it copies the original Session ID into the Assigned Session ID, and assigns its own Session ID.
- Then, in the ICCN, the LAC copies the Assigned Session ID from the preceding ICRQ into the Session ID field.
- And the final ZLB from the LNS increments the Nr accordingly.
Monday, April 9, 2018
Downloading YouTube Videos in a Playlist

With each video in the playlist, by default, you'll get a video file, an audio file, an image file, and some text files - typically subtitles and file descriptions. With the video and audio file, you get multiple variants, if supported by YouTube - different filetypes, resolutions, fps, video/audio codecs, and bitrates.
To remove certain filetypes from the download queue, go to the Linkgrabber tab and enable Filetypes on the right panel. From there, de-select the filetypes you don't want to download.
If you have only a few files, simply select the audio/video variants you want from the drop-down lists beside the remaining files in the main window. If the playlist is composed of hundreds of files, we need a better solution. Again, on the right panel, enable Hoster. Right-click on youtube.com, and select the "Change variant" option.
Saturday, April 7, 2018
Invisible Torrents

Every time you add the torrents, uTorrent says "The torrent you are trying to add is already in the list of torrents. Do you want to load the trackers from it?" You click the Yes button, and nothing happens. Okay, you add the torrent again. This time you click on No. Again, nothing happens. What's going on?!
Apparently, when the uTorrent crashed, the torrents that are in the process of being added are flagged as hidden. Expand the Labels link on the left sidebar, and you'll find the torrents under Hidden. Either delete and add again, or start the download directly via right-click.
If you're not seeing the left sidebar, enable the Show sidebar option under Tools, or simply press F7.
Friday, April 6, 2018
SpaceMonger vs. SpaceSniffer

Tried out two freeware utilities: SpaceMonger 1.4 and SpaceSniffer 1.3.0.1. SpaceMonger has since been acquired by Stardock and has gone commercial. What we'll be reviewing is the old freeware version.

Looks like the winner is SpaceSniffer!
Subscribe to:
Posts (Atom)